Cleaning your attic removes allergens and respiratory irritants that can make your family sick.
Image: Jens Magnusson/Offset
Attic cleaning probably isn’t your idea of a good time. But the dust, dander, and mold in that often-neglected room could be irritating your family’s lungs and kicking up allergies. Plus, a clean attic will enable you to put your great attic ideas into action.
“No one thinks about their attic, but it’s a problem area,” says Mike Tringale of the Consumer Healthcare Products Association.
Attic allergens and irritants constantly seep into your living area through ceiling hatches, doors, recessed lights, and heating and cooling systems (especially if they’re located in your attic).
Attic Cleaning Basics
Dust walls, window frames, and rafters with an electrostatically charged cloth (think Swiffer) or duster, which grabs twice as much dust as cotton cloths. Don’t forget to dust exposed roof trusses, attic fan blades, light bulbs, fixtures, hatches, and door frames.
Vacuum with a HEPA (high-efficiency particulate air) filter vacuum cleaner, which channels all vacuumed air through a filter designed to remove even microscopic particles. A less expensive choice: Install a top-quality, high-efficiency filter bag in your vacuum.
Line shop vacuums with a plastic bag, which traps irritants and makes debris disposal easy.
Wear a National Institute of Occupational Safety and Health mask, which filters a high percentage of airborne particles.
If you suffer from allergies — 50 million people in the U.S. do, according to the American College of Allergy, Asthma, and Immunology — hire a professional to remove the debris. Prices for pro attic cleaning vary depending on region and nature of the cleanup. Get an estimate before hiring a cleaning contractor.
Keeping Irritants Out of Your Attic
Preventing mold growth and sealing out insects and vermin help reduce irritants in your attic.
Mold: Small roof leaks and old, cracked caulking can let in moisture, which may lead to mold damage. Once a year, and after each big storm, walk around your home to inspect your roof from all angles. Repair any loose, missing, or broken shingles. Check windows for missing caulking or cracked panes.
Don’t bother buying a home mold test kit, which may register mold spores that are constantly in the air anyway. If you suspect mold or can see a mold-covered area that’s larger than about 10 square feet, call a certified indoor air quality professional to evaluate your situation.
Dust: Many of those tiny dust mites you see floating around are really dust mite particles, roach parts, and vermin dander made of dried saliva, urine, and feces.
These dust proteins can trigger allergic reactions, so search for tiny cracks and openings in your roof, walls, and windows where vermin and insects can enter. Seal attic air leaks with caulk and polyurethane foam, and repair any holes in attic ventilation screens that are under the eaves and in gable ends.
“Visit HouseLogic.com for more articles like this. Reprinted from HouseLogic.com with permission of the NATIONAL ASSOCIATION OF REALTORS®.”
Paint colors can do a ton to fix a room’s flaws for not much money
Image: A W / EyeEm/Getty
Every home suffers a few negatives, but not every solution requires pricey structural changes. Paint is a frugal remodeler’s go-to solution to perk up a problem room.
Here’s how to pick paint colors to give any room a facelift:
Choosing Paint for a Room That’s Too Small
Painting walls white, cream, pastels, or cool colors (tinged with blue or green) creates the illusion of more space by reflecting light.
White or light colors on walls lifts the ceiling, bringing your eyes up, which makes you feel like you’re in a larger room.
How to use paint color to make a room seem bigger:
Paint trim similar to walls to ensure a seamless appearance that visually expands space.
Use a monochromatic scheme to amplify the dimensions of a room. Select furnishings in the same color. Lack of contrast makes a room seem more spacious.
Extend wall color onto the ceiling an additional six to 12 inches. This will make the room seem taller.
Paint vertical or horizontal stripes. Vertical stripes enhance room height by drawing the eye up; horizontal stripes guide your gaze around the perimeter, making walls seem farther away. Use similar light colors for low-contrast stripes, and your room will look even larger.
Get a bit of a similar effect if you really want a darker shade by selecting a high-gloss paint sheen, which reflects light and enhances space.
For a Room That’s Too Large
When a space feels cavernous, draw walls inward and make it cozy with warm colors (red-tinged), because darker hues absorb light.
Similarly, a dark or warm color overhead (in a flat finish) helps make rooms with high or vaulted ceilings seem less voluminous.
For a Room That Needs a Soothing Vibe
The right paint choice can lend tranquility to a bathroom, primary suite, or other quiet, personal space. A palette of soft, understated color or muted tones help you instill a calming atmosphere.
Some good choices include pale lavenders, light grays or greens, and wispy blues.
For a Room With Special Features That No One Notices
Call out notable features in a room with paint. Dress crown moldings and other trims in white to make them pop against walls with color.
Make a fireplace or other feature a focal point by painting it a color that contrasts with walls.
“Using a higher sheen of paint on woodwork, such as baseboards and door or window casings, creates a crisp edge and clear transition from the wall to the trim,” says Petra Schwartze, a Minneapolis architect with TEA2 Architects.
For a Room With Something Ugly to Hide
Not everything should stand out in a space. Using a low-contrast palette is a good way to hide unappealing elements or flaws.
Conduit, radiators, and other components painted the same color as the wall will seem to disappear.
Selecting low-sheen or flat paint colors also helps hide flaws. Unless walls are smooth, avoid using high-gloss paint because it reflects light and calls attention to an uneven surface.
You can build a garage workshop, complete with lighting, for less than $500.
Garages often harbor a not-so-secret second life: heroic home workshop. They’re well-suited to the task, with a tolerance for the noise and dust of do-it-yourself projects.
You can assemble a basic workbench, cabinets, shelving, and add simple overhead lighting for less than $500.
But if a garage workshop isn’t comfortable and convenient to use, you’ll avoid projects rather than enjoy them.
Here are the essentials:
Get (or Build) a Solid Workbench
Your primary work surface should be a rock-solid bench with a hard and heavy top. Buy or build the best you can manage. (Then vow to keep the top clear — tools and materials have a way of eating up workbench space).
Premade workbenches run $100 to $500 and come in many lengths; they’re usually 24 inches deep. A 38-inch height is typical, but you might be more comfortable with a work surface as low as 36 or as high as 42 inches. Some benches include vises, drawers, and shelves.
Build one yourself using readily available plans. A simple, sturdy workbench takes less than a day to build and materials cost less than $100. The Family Handyman magazine offers detailed instructions for several, including an inexpensive, simple bench. A more complex bench with a miter saw stand and drawers costs $300-$500 to build and takes a weekend.Popular Reads
High-intensity lights (halogen, LEDs, and others) are great for over-bench task lighting. An LED task light with a flexible goose-neck ($75-$150) puts light where you need it.
If your garage has a finished ceiling, recessed fixtures (can lights) are inexpensive ($10-$20) and are good for task and ambient lighting.
Ceiling-mounted fluorescent light fixtures are the classic, low-cost solution for workshop lighting. A two- or four-bulb, 48-inch fluorescent fixture costs less than $50.
When shopping for workshop lighting, think lumens rather than watts. A lumen is a measure of lighting brightness, and is a handy way to compare today’s new energy-efficient light bulbs. Lighting fixtures and bulbs have labels that indicate lumens per device. A general rule of thumb is to use 130 to 150 lumens per square foot of work space.
For example, a 40-watt fluorescent bulb puts out about 2,200 lumens. A 60-watt incandescent bulb puts out about 800 lumens.
Be Sure to Have Adequate Electrical Power
Along with your new lights, be sure your garage workshop has adequate electrical service — outlets and capacity — to accommodate your arsenal of power tools. Place outlets nearby; don’t depend on extension cords stretched across your garage — they can be a tripping hazard. If you don’t have 30-amp circuits on your garage service, talk with an electrical contractor about making this simple upgrade.
Ballpark $75-$100 an hour for an electrical contractor, plus a probable service-call fee of $50 to $100. Rates will vary across regions of the country.
Good electricians work quickly, so installing shop lights might take only an hour or two if access to electrical service is readily available. Increasing circuit capacity generally requires running new, heavier-gauge wire from your circuit-breaker box to the shop site.
Create Smart Storage
Don’t make yourself rummage through old coffee cans full of rattling bolts and bits: Visit home improvement centers for garage storage ideas and products.
Modular, wall-mounted garage storage systems let you configure shelves, bins, and hooks the way you need. Cost is about $10 per sq. ft. of wall space.
Plastic bins and hefty tubs protect tools, sandpaper, and tool manuals from insects, rodents, and dust. A 10-gallon plastic tub with lid is $5-$8.
Old kitchen cabinets, available where salvaged building materials are sold, are a great way to add storage — and a homemade workbench. Salvaged cabinets are about 50-75% cheaper than new. Top a run of cabinets with ¾-inch plywood for a durable work surface.
“Visit HouseLogic.com for more articles like this. Reprinted from HouseLogic.com with permission of the NATIONAL ASSOCIATION OF REALTORS®.”
A super-easy plan for getting organized without adding to your home-is-school, home-is-work, home-is-everything time burden.
Image: Westend61/Getty
Did you ever notice that your self-improvement pacts with yourself are action oriented? Walk 10,000 steps a day. Fix that leaky faucet. Register for VolunteerMatch.
But “get organized”? It’s a goal so broad that just trying to figure out what action to take makes you wonder what you were thinking in the first place. It’s like you need an organizing plan for your organizing.
Ta-da!
Here it is. Follow these steps, spending less than an hour day (sometimes just a few minutes), to a better organized home:
1. Do That Project
“What about your space is making you feel uncomfortable or overwhelmed?” asks Amy Trager, a professional organizer in Chicago. Is it the paperwork disaster in your office? The pile of clothes teetering on your dresser? Or that mess that surrounds your doorway? Start with what’s annoying you, she says. One hour on that task will rev up your organizing engine.
2. Create a Go-Away Box
Put in it anything you’re planning to donate (or give to a friend or take to recycle). And keep it by the door so you can easily grab it when you’re leaving.
3. Deal With the Decorations
Hallelujah — the holidays are over! When you’re putting away your décor, donate anything you didn’t bring out last season and separate decorations by holiday. No need to dig through your St. Paddy’s clovers when you’re searching for a menorah.
4. Create a System for Your Entryway
Set up a “command center” so your front door doesn’t become a lawless accessories arena, especially during winter months. Add hooks for coats, bins for shoes, and a mail sorter if you need it. (Remember to keep a place for your go-away box.)
5. Wrangle Your Pet Supplies
Minimize the time spent scrambling when your pup is desperate for a walk or eager for a meal. Hang hooks and cubbies near the door and keep leashes, kibble, bowls, and toys in one convenient spot.
6. Organize Your Spices
Arrange your herbs and spices alphabetically, by cuisine, or by brand — whatever makes them easier to find when you’re in the middle of your noodle stir fry.
7. Pare Down Your Utensils
You’ve accumulated several dozen kitchen utensils in your culinary career: can openers, microplanes, four wine openers (what?!). Cut back the collection and use drawer dividers to keep the rest in order.
8. Reconfigure Your Pots and Pans
Stop digging around in your shelves for the oversized, cast-iron skillet. Donate the pots and pans you hardly use and install cupboard organizers to help manage the rest.
9. Throw Away Expired Foods
You’ve never used Worcestershire sauce after that one time. Go through your refrigerator and pantry, and ditch or donate anything past its prime or that you won’t use.
10. Stack Your Pantry Staples
Make better use of your pantry by sorting through your staple dry goods — think flour, sugar, pasta, oatmeal, dry beans — and put them in airtight, stackable containers. You’ll free up a ton of space, too.
11. Downsize Your Kitchen Gadgets
You had noble intentions when you purchased that spiralizer. (Zucchini noodles every night, right?) Give those space hogs to someone else with lofty dreams.
12. Say No to Coffee Mug Overload
Every time you lose a sock, a new coffee mug appears. Keep one or two mugs for every coffee or tea drinker, and donate the rest.
13. Sort Your Food Storage Containers
No singles allowed. Toss any tops or bottoms that have no mates.
14. Reassess Your Display Shelves
Shelves crammed with knickknacks, books you’ll never read, and stuff you somehow accumulated are just a waste of space. Donate books to the library, discard the junk, and arrange what’s left in a way that pleases you.
15. Deal With Your Cables
With a Roku, PlayStation, DVD player, and cable box, it’s no surprise your entertainment center is a mess. Use bread tags or cable ties to create ID tags for each plug and bundle the clutter with Velcro strips.
16. Put Clothes on New Hangers
Switch your clothes over to the slimmer, grabbier hangers. They use less space and keep your clothes from sliding down to your closet floor. As you do this, discard the clothes you never wear.
17. Corral Your Accessories
Belts, scarves, purses, hats — all the accessories that don’t have a drawer or spot in the closet can end up everywhere. Buy an accessories hanger or install a simple series of hooks to give your wardrobe’s smallest members a home.
18. Purge Under the Bed
Under-bed storage is ideal for out-of-season clothing. But when out-of-season becomes out-of-sight and out-of-mind, clear out those clothes you’ll never wear again from this precious storage space.
19. Declutter Your Desk
When your workspace is swimming with collectibles, staplers, Post-its, and more, paring down can keep you focused when it’s time to hunker down.
20. Shred Old Paperwork
Not every form, statement, and tax record needs to stay in your filing cabinet forever. Check out this list to make sure you’re not wasting space. Shred the rest to ward off identity thieves.
21. Tidy Your Files
Now that you’ve shredded unnecessary paperwork, tidy up your files by organizing them and labeling them clearly. Colorful folders can help organize by theme (home stuff, tax stuff, work stuff, etc.).
22. Get Rid of Mystery Electronics
Admit it. You’ve got a drawer where black mystery cords, chargers, and oddball electronic bits go to die. Free up that drawer for better uses or at least get rid of the items you know for sure are “dead.”
23. Pare Down Your Personal Care Stuff
Your intentions were honorable when you bought that curl-enhancing shampoo — but it expired two years ago, and you haven’t used it since. Throw away any expired potions, salves, hair products, and medicines.
24. Tackle Under-the-Sink Storage
Clean everything out. You’ll be amazed at what you find (like those Magic Erasers you could never find). Then put everything you’re keeping back into bins you can easily pull out so that nothing gets lost again.
25. Hang a Shelf
Wall storage is so often overlooked. Find a spot in your home where a shelf would solve a problem and hang it. Maybe it’s for some toiletries in the bathroom, laundry supplies, or your kid’s stuffed toys.
There are the towels you use — and the stack of towels you never use. Donate them to the animal shelter. Those torn pillowcases? Convert to rags or toss. Same for napkins, dishtowels, potholders, etc.
27. Hang a Shoe Organizer
Hanging shoe organizers can solve a ton of storage problems beyond the obvious. They can store scarves, mittens, cleaning supplies, craft supplies. You can even cut them to custom-fit inside a cabinet door.
There’s no shame in a junk drawer, but why not organize it? Dump the whole thing on one surface and sort everything into piles. Use drawer dividers to keep each pile in its own space.
29. Store Your Tools the Right Way
Finding the right Phillips-head screwdriver to put together that cute IKEA bookshelf shouldn’t be so hard. Track down your hammers and screwdrivers, and arrange them in one easy-to-access spot, like a pegboard.
30. Plan for the Future
See how much you’ve accomplished! Take a look around your newly organized home, noting any spaces you missed. Then dream a bit about your next home project. Maybe paint that dining room, finally?
“Visit HouseLogic.com for more articles like this. Reprinted from HouseLogic.com with permission of the NATIONAL ASSOCIATION OF REALTORS®.”
A super-cool laundry-drying rack and 3 more projects take your energy-saving efforts to the next level.
Sure, sealing air leaks, and adding insulation, are great ways to boost your home’s efficiency. But if you’ve been there, done that, check out these four easy-to-make projects. Each has an energy savings benefit.
Here’s an interesting tidbit: Laundry dryers account for 6% of the electricity used in the U.S. each year, according to a group that studies dryer efficiencies. That’s roughly the same amount of electricity consumed annually by the state of Massachusetts.
That’s why we like this flat and compact DIY drying system by Debbie, from Me and My DIY. Although she made the rack inside a built-in wall unit, you can customize the design for a cabinet or even a closet. She simply used PVC piping and drawer slides.
Tip: If you’re so inclined, you can calculate how much it costs to run your electric dryer annually.
Look up your dryer’s heating element rating in the manual.
Multiply the kilowatt rating by your hourly kilowatt cost.
Your total is the price you pay per load, per hour. For example: (Dryer’s kw rating) x (price per kwh) = price per load, per hour
Now multiple that amount by the number of loads you dry each month. If you pay 70 cents to dry a single load of laundry in one hour, and you dry 20 loads each month, that’s $168 per year, or (20 x .70) x 12 = 168.
Popular Reads
DIY Frosted Windows
Tricia, from the blog Making It Feel Like Home, used cool frosted contact paper on the small windows by her front door. Although the paper she selected adds privacy, you’ll score a two-fer by using insulating window film instead.
Tip: Some films reduce radiant heat transfer through glass by as much as 50%.
Depending upon the type of film you select and the amount of area covered, you can:
Help keep a room cool in the summer and warm in the winter.
Cut UV exposure, so furniture fabrics won’t fade.
Strengthen windows for added security.
Window film starts at around $1.50 per square foot.
See how Tricia created this project and where to download the stencil she used here.
When Rebekah Greiman of Potholes and Pantyhose.com discovered that an inch of rainfall on a 1,000-sq.-ft. roof produces 600 gallons of water, she decided to make two rain barrels. Now she waters her yard and garden for free.
You can see how Rebekah transformed a recycled pepper barrel into her own private water reservoir here.
Tip: A rain barrel will help most homeowners save about 1,300 gallons of water during peak summer months, according to the Environmental Protection Agency.
All those pretty photos on all those pretty home design websites are fun to click through — and maddening when it comes time to make bathroom remodeling decisions. Too many choices.
We’ve got your back: We distilled all the visual noise down to the essence of what makes a bathroom remodel truly great.
With the “Remodeling Impact Report” from the National Assocation of REALTORS® pegging the national median cost of a bathroom remodel at $30,000, you’ll want to make sure you get maximum comfort, convenience, enjoyment — and resale juice when the time comes to sell.
Here’s the definitive list of practical (and hedonistic) features.
Enduring, waterproof, and good-looking, ceramic tile bathroom flooring is the classic, never-out-of-style surface material for any bathroom. Plus, consumers (read: future buyers) love it: In a survey from the National Kitchen and Bath Association (NKBA), 83% of respondents said ceramic tile was their No. 1 choice for bathroom flooring.
With prices ranging from a mere $1 per square foot to $20 and more, you’ll find a huge array of choices, styles, and colors that’ll work with any budget.
But ceramic tile can chill your tootsies. Pair your ceramic with thin electric radiant mats that go under the tile without raising the floor level — ideal for retrofit installations.
A typical system uses about the same amount of electricity as three 100-watt incandescent light bulbs. Plus, radiant heat is often more efficient than forced-air heating because it eliminates heat loss through the ducts, says the U.S. Department of Energy. It also distributes heat uniformly across the floor, taking less time to warm a room than other types of heat.
At $5 to $15 per square foot to install, radiant mats are as easy on the budget as they are on the sole.
Nice-to-have ceramic tile accompaniments:
No-slip ceramic tile. With its finely textured surface, it’s great for traction, making it an exceptionally safe bathroom flooring for young kids or folks with limited mobility.
Look for one of two ratings on the packaging.
A COF (coefficient of friction) standard of .60 or greater means the tile is rated as non-slip when wet by the Ceramic Tile Institute.
The DCOF (dynamic coefficient of friction) AcuTest measurement, the new gold standard now coming on the market, requires a value of .42 or above for non-slip tile.
Tip: No-slip tile’s texture can trap dirt, and that requires extra elbow grease to clean.
Epoxy grout. New formulas resist staining and discoloration over time better than traditional ones. They’re also more flexible than regular grout and less prone to cracking, making them ideal for flooring installations.
The key to grouting success is the installer. Make sure your contractor is familiar with epoxy grouts, which require finesse to shape and handle. You’ll pay an extra $50 to $100 to cover a 6-foot-by-12-foot bathroom floor with epoxy, according to the Tile Council of North America.
Programmable radiant heat thermostat. Want to treat yourself extra nice? Greet the day with a sigh of relief when you add a wall-mounted programmable thermostat (about $60 to $200) that’ll start warming up your floors whenever you want. How about a half an hour before your alarm goes off?Popular Reads
More than 60% of respondents to a recent survey by the American Institute of Architects said walk-in, curbless showers are increasing in popularity. For good reason: They’re stylish, safe for folks of all ages, and oh so easy to clean.
They dovetail nicely with ceramic tile floors, too. You can have one continuous surface that moves seamlessly from shower to the main bath area.
Plus, they’re all about marketability. As the population ages, a contemporary walk-in is a selling point.
Be sure to hire a remodeling contractor with experience. Making a curbless shower takes know-how — the shower floor has to slope to the drain hole, which means the new drain will be located below the surface of the existing floor.
To make that work, you’ll have to remove old flooring and subflooring and alter the framing underneath the floor. It’s a good idea to consult with your local building authorities beforehand so that the work will be up to code and pass inspection.
We love natural stone, but in this battleground of soaps, lotions, pastes, and poultices, we prefer the impervious beauty of synthetic, low-VOC quartz.
“Consumer Reports” testing gives the edge to quartz over granite, citing quartz’s ability to resist stains and abrasions. It’ll look good year after year. Plus, the surface is so impervious bacteria can’t lodge in it.
Quartz countertop material is a synthetic composite made up of about 90% quartz particles held together with binders. It’s virtually maintenance-free — it never needs to be sealed — and comes in dozens of styles and colors. If you’re stuck on the idea of stone, many quartz versions mimic the real thing.
Quartz runs $40 to $100 per square foot, installed (about the same as granite, although some varieties of granite get very pricey).
#4 One Big Sink Instead of Two Small Ones
Togetherness is a beautiful thing, but in the master bath, you’re church and your partner’s state. Establish your individuality without losing your bond with a large (38-inch or more) sink ($350 to $1,200). One big sink saves more counter space than two, and still lets you both wash up simultaneously.
Spec an undermount sink to go with your quartz countertop — undermounts have no protruding lip and help make cleanup a snap. The perfect companion to quartz countertops, undermount lavatory sinks are the preferred choice of 87% of respondents to a 2013 survey from the NKBA, and have been for several years.
Tip: Extra-large undermount sinks may need extra support. Check the sink specs and confer with your installer before you buy.
#5 Single-Hole, Motion-Activated Faucet
Ah, the savings. “Motion-activated, touchless faucets shut off automatically so you’re not running the water continually, like when you’re brushing your teeth, which saves a significant amount of water,” says NKBA president John Petrie.
Besides that, we love the fact that sleek, single-hole touchless faucets are right in step with the calm, simple lines of transitional style. Transitional is a universally appealing, trend-defying design that’s cozy, elegant, and ensures a great return on your investment.
Finally, have you ever tried to clean around a two-handle vanity faucet with a narrow (4-inch) spread? Did you require therapy afterward? We heartily endorse the single-hole, lever-type faucet for your bathroom sink — and your sanity.
These tres-cool faucets run $200 to $650 and up. Some have temperature controls so you (or your kids) can’t get scalded.
For extra utility savings, look for faucets with the WaterSense label that use only 1.5 gallons per minute (gpm) compared with the standard 2.2 gpm flow of regular faucets.
#6 Humidity-Controlled Exhaust Fan
What’s homebuyers’ No. 1-requested bathroom feature? An exhaust fan, says a report from the National Association of Home Builders. Wow — bath fans beat out linen closets and separate tubs and showers.
A fan or an operable window in a bathroom is required by building code. But who wants to open a window in winter to get rid of excess humidity? Get a fan with a humidity-sensing on/off switch. It’ll turn on when moisture levels are high and automatically shut off when things return to normal. That keeps mold at bay, ensures you’re not sucking out air-conditioned or heated indoor air, and prevents the fan from using power long after it needs to.
Tip: Make sure your contractor vents the fan to the outside, not the attic, or you might develop mold problems aloft.
Other fan options include multiple speeds, nightlights, and manual timers; you’ll pay up to $600 for a fan with all the goodies.
#7 High-Efficiency, Dual-Flush Toilet
Saving water is our future; a high-efficiency, dual-flush toilet reduces water usage and appeals to any buyer looking for a cost-effective home.
All 25 toilets recently tested by “Consumer Reports” “removed liquid waste superbly,” including the dual-flush models. This is a change, says CR, from previous tests, when many dual-flush models performed well with solid wastes but underperformed with liquid wastes.
Tip: Bidets are standard features in Asia and Europe, but they’ve been slow to catch on in the U.S. (and there aren’t any WaterSense-labeled models). Nevertheless, some manufacturers are creating hybrid toilets and toilet seats ($650) that have bidet features, and we’re going on record as recommending them. They save lots of TP, and they appeal to our melting-pot homebuyer mix of races and cultures, a benefit when it comes time to sell.
The floor area of a bathroom is precious. Why waste any with a swinging door that eats up some 14 square feet of space? A pocket door or barn door slides out of the way without requiring any clearance, leaving more room for storage and design flexibility.
Google Trends shows that interest in sliding barn doors hovered at a lukewarm rating of about 40 from 2004 through 2011, when interest upticked to 70 before reaching an all-time high of 100 just last year — the highest possible rating on the Google interest scale.
The sliding door phenomenon partners neatly with sustainability: old, salvaged doors of all kinds make showpiece barn doors for your bathroom.
So pocket or barn doors? Either can work well, depending on your budget.
Our editors had a lively debate about recommending pocket doors, which disappear into the wall. Some said the typical recessed door pull for pocket doors is awkward and can pinch fingers.
Modern tech to the rescue: You can find edge-mounted pocket door hardware with a handle that pops out at the touch of a button ($121). Or, add a door stop inside the wall framing to prevent the door from sliding all the way inside the wall. That way, you can safely use a recessed pull or add a traditional handle or knob to open and shut the door.
Tearing out drywall and reframing for a pocket door is $1,000 to $3,500, depending on the complexity of the job.
You can install a barn-style door, which hangs from a track above the doorway and slides in front of a wall., for less. It’s a good DIY project. Barn door kits cost $400 to $900, but if you’re handy, buy the hardware for $100 to $500 and make your own door, or find a used door at a salvage building supply store.
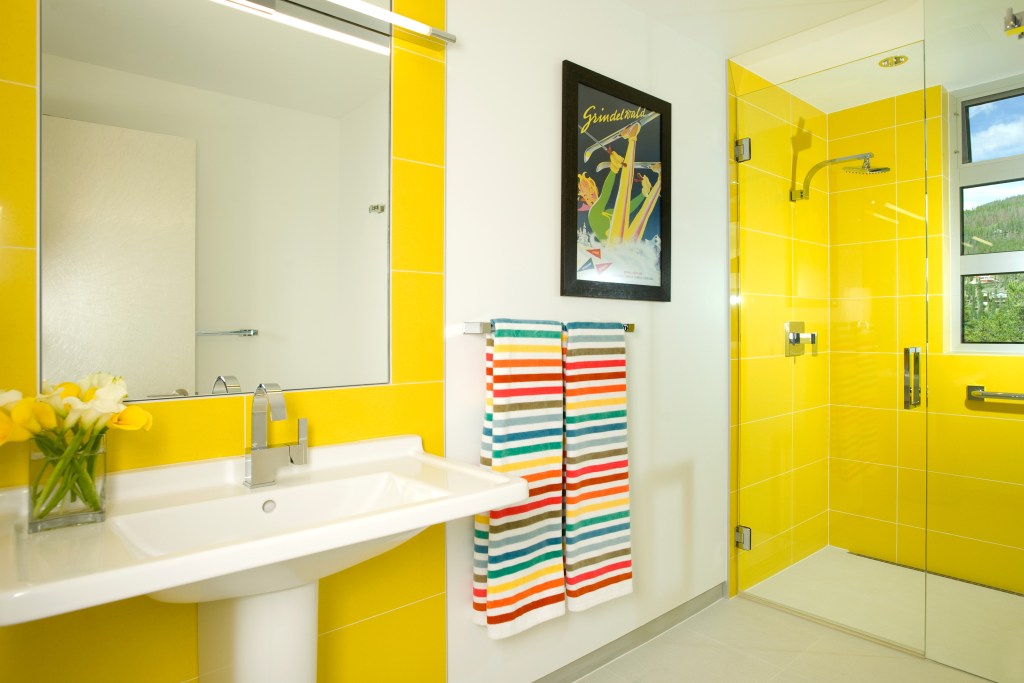
#9 Calm Colors
It’s always cool to be up on trends, but we say make your bathroom an exception. It’s your sanctuary — it should be soothing and filled with light.
That doesn’t mean it has to be boring. In fact, it’s a good idea to include a painted wall surface so you can dash color about on a whim and change it just as easily. Non-permanent items, such as artwork and antique mirrors, add beaucoup personality.
But permanent surfaces — ceramic tile and fixtures — need quiet, calm neutrals. White, beige, and gray are favorites. In fact, the NKBA says gray is the trendiest color for baths these days, so you win on two fronts, for now.
“A neutral color palette really is safe, especially in terms of resale value,” says NKBA’s Petrie. “You can always be expressive with colorful towels or curtains, things that are less expensive and easier to change than more permanent features.”
Plus, lighter colors help bounce light around, helping you see what a fantastic bathroom you’ve put together.
“Visit HouseLogic.com for more articles like this. Reprinted from HouseLogic.com with permission of the NATIONAL ASSOCIATION OF REALTORS®.”
Cleaning your attic removes allergens and respiratory irritants that can make your family sick.
Image: Jens Magnusson/Offset
Attic cleaning probably isn’t your idea of a good time. But the dust, dander, and mold in that often-neglected room could be irritating your family’s lungs and kicking up allergies. Plus, a clean attic will enable you to put your great attic ideas into action.
“No one thinks about their attic, but it’s a problem area,” says Mike Tringale of the Consumer Healthcare Products Association.
Attic allergens and irritants constantly seep into your living area through ceiling hatches, doors, recessed lights, and heating and cooling systems (especially if they’re located in your attic).
Attic Cleaning Basics
Dust walls, window frames, and rafters with an electrostatically charged cloth (think Swiffer) or duster, which grabs twice as much dust as cotton cloths. Don’t forget to dust exposed roof trusses, attic fan blades, light bulbs, fixtures, hatches, and door frames.
Vacuum with a HEPA (high-efficiency particulate air) filter vacuum cleaner, which channels all vacuumed air through a filter designed to remove even microscopic particles. A less expensive choice: Install a top-quality, high-efficiency filter bag in your vacuum.
Line shop vacuums with a plastic bag, which traps irritants and makes debris disposal easy.
Wear a National Institute of Occupational Safety and Health mask, which filters a high percentage of airborne particles.
If you suffer from allergies — 50 million people in the U.S. do, according to the American College of Allergy, Asthma, and Immunology — hire a professional to remove the debris. Prices for pro attic cleaning vary depending on region and nature of the cleanup. Get an estimate before hiring a cleaning contractor.
Keeping Irritants Out of Your Attic
Preventing mold growth and sealing out insects and vermin help reduce irritants in your attic.
Mold: Small roof leaks and old, cracked caulking can let in moisture, which may lead to mold damage. Once a year, and after each big storm, walk around your home to inspect your roof from all angles. Repair any loose, missing, or broken shingles. Check windows for missing caulking or cracked panes.
Don’t bother buying a home mold test kit, which may register mold spores that are constantly in the air anyway. If you suspect mold or can see a mold-covered area that’s larger than about 10 square feet, call a certified indoor air quality professional to evaluate your situation.
Dust: Many of those tiny dust mites you see floating around are really dust mite particles, roach parts, and vermin dander made of dried saliva, urine, and feces.
These dust proteins can trigger allergic reactions, so search for tiny cracks and openings in your roof, walls, and windows where vermin and insects can enter. Seal attic air leaks with caulk and polyurethane foam, and repair any holes in attic ventilation screens that are under the eaves and in gable ends.
“Visit HouseLogic.com for more articles like this. Reprinted from HouseLogic.com with permission of the NATIONAL ASSOCIATION OF REALTORS®.”
Not all home improvements are created equal. These will reward you the most when it comes time to sell.
Image: Nigel Riches/Offset
Your home is in the perfect location, came at the perfect price, with the perfect lot. (Yay southern exposure!)
But the home itself? Perfect isn’t the adjective you’d use. But you knew that moving in, and now you’re ready to start making it just right.
Where to begin, though? How about with data? Data is that friend who tells you like it really is.
Because while any home improvement that brings you joy is priceless, not all add as much home equity as you might expect.
The “Remodeling Impact Report” from the National Association of REALTORS® has tons of data on how much improvements cost — and how much of those costs you can recoup.
Here are eight of the report’s best home remodeling projects with equity-building might:
If you find yourself sprinting for the buckets when it starts to sprinkle, getting a new roof should be your No. 1 to do. Measuring rainfall from the indoors isn’t cool.
The cost: $12,000
The return: 100% at $12,000
Considering it’s what’s between you and the elements, it’s a no-brainer.
Not sure if you need a new roof? Signs you might include:
Shingles are missing, curling up, or covered in moss.
Gritty bits from the asphalt shingles are coming out the downspout.
No surprise that a garage door replacement project made it onto this #winning list — a new garage door provides a big boost for your home’s curb appeal at a relatively modest cost.
The cost: $2,000
The return: 100% at $2,000
There are options galore, too. A host of factory-finish colors, wood-look embossed steel, and glass window insets are just some of the possibilities that’ll give your doors bankable personality.
#5 Better Insulation
Insulation is tucked out of sight, so it’s often out of mind — that is, until you’re forced to wear your parka indoors because it’s sooo darn cold.
The cost: $2,500
The return: 100% at $2,500 (plus the added savings on heating and cooling costs!)
Those are two of the three benefits of vinyl siding. The third, of course, is your home’s value.
But if long-time homeowners look at you funny when you mention vinyl siding, just tell them that today’s vinyl is way better than what they remember because of fade-resistant finishes and transferable lifetime warranties.
The cost: $18,300
The return: 82% at $15,000
#7 Fiber-Cement Siding
Want fiber-cement siding instead? It also shows a strong payback of 86%. Although it’s the pricier option — you’ll spend about $18,600 with a payback of about $16,000 — it has one thing vinyl still lacks — the perception of quality.
The cost: $18,600
The return: 86% at $16,000
#8 Basement Conversion to Living Area
With more homeowners working from home and spending time at home because of inflation and high prices, adding living space is a priority. Basement conversions to living areas were a popular interior renovation.
The cost: $57,500
The return: 86% at $49,150
In addition to the financial return, remodeling provides emotional benefits. Eighty-four percent of homeowners have a greater desire to be in their home after finishing a project. And 69% enjoy their homes more. Fifty-seven percent feel happy, and 39% feel satisfied when they see their completed project. With results like those, remodeling is an investment you can feel confident about.
“Visit HouseLogic.com for more articles like this. Reprinted from HouseLogic.com with permission of the NATIONAL ASSOCIATION OF REALTORS®.”
Your house gives you so much: security, pride, shelter. With all that on the line, it’s easy to assume the costs of keeping it up just are what they are. But wait. There are plenty of expenses that are simply a waste.
Here’s how to save money each month without putting a dime of home value at risk.
#1 Clean Your Lightbulbs
What? Who does that? Well, smart people (those who know shrewd, easy ways to save money). A dirty bulb emits 30% less light than a clean one. Dust off both the bulb and fixture, and you might be able to cut back on the number or brightness of lights in each room without noticing any difference.
#2 Keep Your Fridge Full
Solid items snuggled together retain the cold better than air and help keep one another cold — requiring less energy overall. Leaving town for awhile and fridge is empty? Fill voids in the fridge or freezer with water bottles.
#3 Switch Your Bulbs to LEDs
The average light-emitting diode, LED, light bulb used five hours a day can save $10 to $20 in energy costs vs. an incandescent bulb. If you replace just five of your most-used incandescent bulbs, your savings will add up.
And LEDs last 15 to 20 times longer than incandescents, so you won’t have to replace them nearly as often.
#4 Use Power Strips
Here’s how to save money — a lot of it — on bills. Appliances like coffee makers, TVs, and computers continue to suck power even when they’re off, which can add 10% to your monthly utility bill and increase the average household’s annual electric bill by $100 to $200. And did you know the AC adapter for your laptop keeps drawing power even if the laptop isn’t plugged in? Stop this slow money burn by connecting them to an easy-to-switch-off power strip.
#5 Use a Toaster Oven When Possible
Toaster ovens use 50% to 70% less energy than a full-size oven.
#6 Set Your Water Heater to 120 Degrees
Hot water heaters often come with a factory setting that’s higher than you need. You’ll cool your water heating costs by 3% to 5% every time you lower the temperature setting by 10 degrees.
#7 Insulate Your Water Heater
For about $30, an insulating jacket or blanket can shave 7% to 16% off your water heating costs for the year. Just make sure to follow the manufacturer’s directions to avoid creating a fire hazard.
Just switching from hot to warm water will cut every load’s energy use in half, and you’ll reap even more savings taking the temp down to cold. And don’t worry: Your clothes will get just as clean from cold water, thanks to the efficiency of today’s detergents (except in the case of sickness, when you’ll want hot water and bleach).
#9 Use the Right Dryer Cycle
If you’re using a high heat setting for each load, you could be using more energy than you need. Almost all fabrics can be dried with a lower heat setting, such as the permanent press setting. It uses less energy and has the bonus of extending the life of your fabrics. Save the higher heat for items such as sheets and towels.
#10 Use Homemade Cleaners
Many commercial products rely on baking soda or vinegar for their cleaning power, so why not make your own? Odds are, you likely have a lot of the ingredients sitting in your cabinets or pantry right now.
#11 Cut Back on Laundry Detergent
Never mind the barely visible measurement lines in the cap: You typically need only a tablespoon of detergent. And, clothes actually get cleaner when you use less, because there’s no soap residue left behind.
#12 Ditch Disposable Sweeper and Mop Head
Stop throwing money away every time you clean! Refill your Swiffer Sweeper with microfiber cloths. Just cut to size and use them dry for dusting or with a little water and floor cleaner for mopping. Or switch to a microfiber mop with a washable head.
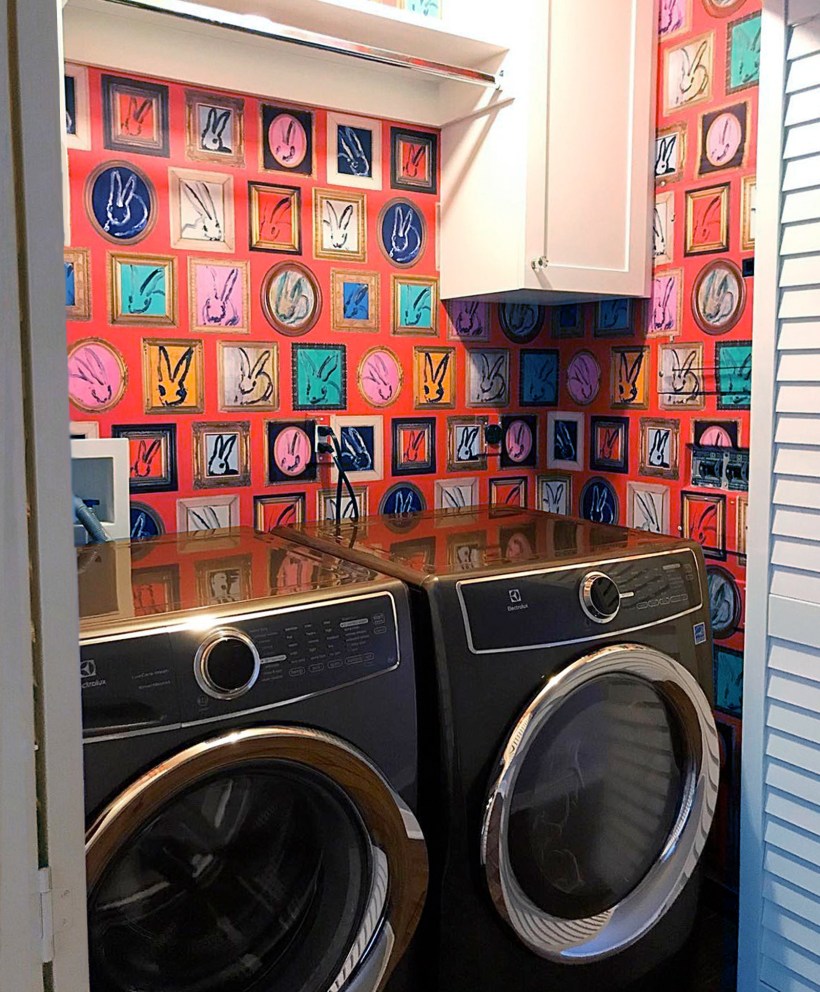
#13 Stop Buying Dryer Sheets
Another easy swap? Give up your dryer-sheet habit (about $7 for 240 loads) in favor of wool dryer balls (about $6.50 for four, which can last for up to 1,000 loads each). Of course, depending on your laundry preferences, you can always just go without either.
#14 Cut Scouring Pads in Half
Most clean-ups don’t require a full one.
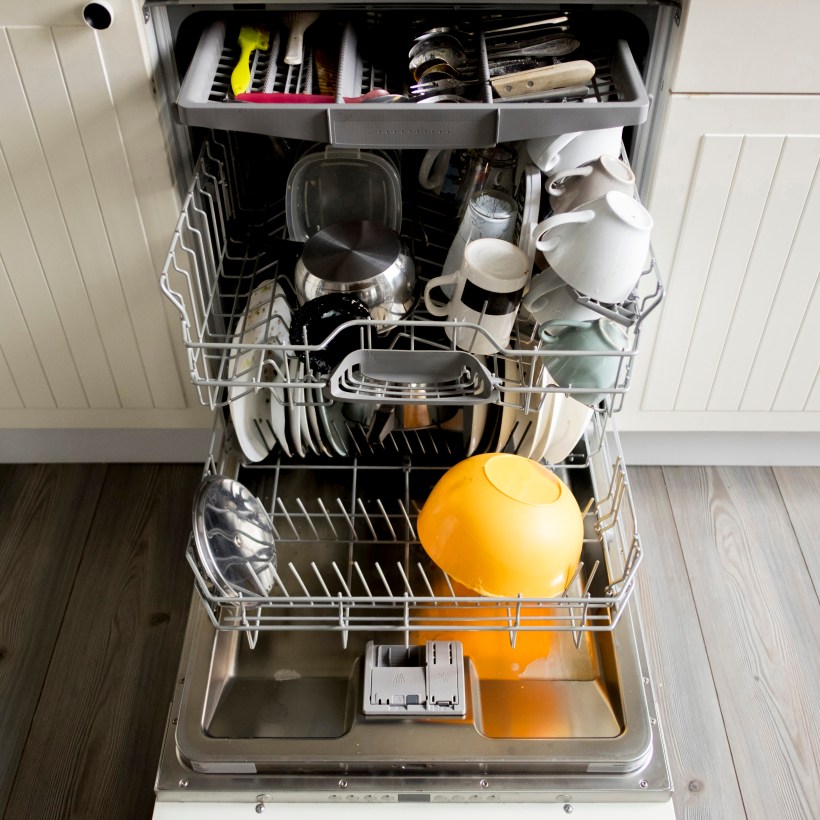
#15 Don’t Rinse Dishes
Image: Cavan Images/Offset
Two minutes of rinsing with the faucet on full-power will consume 5 gallons of water — the same amount efficient dishwashers use during an entire cycle. Shocking, right? And it’s an unnecessary step, since most newer models are equipped to remove even stubborn food debris. Just be sure to clean the dishwasher trap regularly to keep your dishwasher running efficiently.
#16 Keep a Pitcher of Water in the Fridge
You won’t have to waste time and money running the faucet, waiting for it to get cold enough for a refreshing sip.
#17 Set a Timer for the Shower
The average American takes an eight-minute shower and uses about 17 gallons of water. It’s easy to linger, so set a timer for five minutes. Or try this more entertaining idea: Time your shower to a song or podcast segment.
#18 Install Low-Flow Fixtures
By installing a just one low-flow showerhead, the average US household can save about 2,900 gallons of water every year and decrease home water consumption by 40% or more.
#19 Replace Your Old Water-Hogging Toilet
The U.S. Environmental Protection Agency says that by replacing old, inefficient toilets with WaterSense-labeled models, the average family can reduce water used for toilets by 20% to 60% — nearly 13,000 gallons of water savings per year. (WaterSense-labeled toilets are independently certified to meet criteria for both performance and efficiency, according to the EPA.) They could also save more than $140 per year in water costs.
#20 Close Closet Doors
Each closet and pantry may hold a paltry amount of square footage, but you’re still heating and cooling it. Add up all the storage space, and you’ve got the equivalent of a small room. Shut the doors to keep the conditioned air out.
#21 Program the Thermostat
You can save as much as 10% a year on heating and cooling by simply turning your thermostat back 7 degrees to 10 degrees Fahrenheit from its normal setting for eight hours a day. You can easily save energy in the winter by setting the thermostat to around 68 degrees while you’re awake and setting it lower while you’re asleep.
#22 Don’t Crank the Thermostat Up or Down Too Far
A common misconception is that a furnace works harder than normal to warm a space back to a comfortable temperature after the thermostat has been set back, resulting in little or no savings, says Energy.gov. In fact, as soon as your house drops below its normal temperature, it will lose energy to the surrounding environment more slowly Avoid setting your thermostat at a colder setting than normal when you turn on your air conditioner. It won’t cool your home any faster and could result in excessive cooling and unnecessary expense.
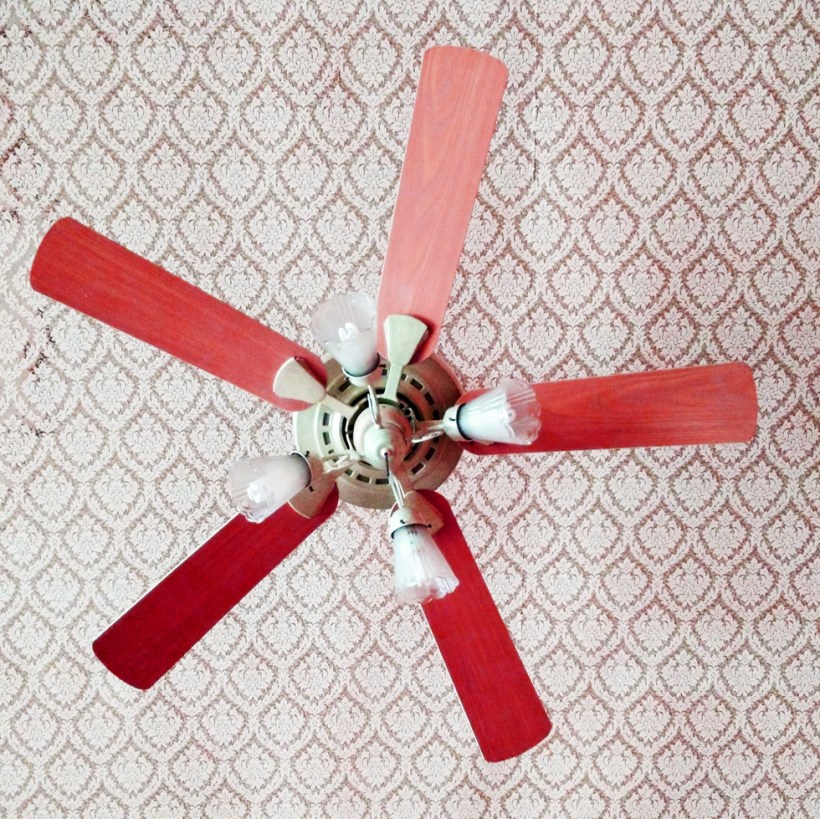
#23 Use Fans Year-Round
Image: Iaobzjls/Getty
Ceiling fans can reduce your summer cooling costs and even reduce winter heating bills — but only if used correctly. Flip the switch on the base to make the blades rotate counterclockwise for a cooling effect or clockwise to help distribute heat in the winter. And in the warmer months, an attic or whole-house fan can suck hot air out and help distribute cooler air so you can give the AC a little break.
#24 Caulk or Weatherstrip Around Doors and Windows
Caulk may not have the charisma of something like solar panels, but using it to seal air leaks around doors and windows will deliver immediate savings rather than a 14-year payback. You’ll spend $3 to $30 and save 10% to 20% on energy bills.
For gaps between moving parts that can’t be caulked, add weatherstripping.
#25 Add Insulation
By sealing air leaks and installing the right insulation in places like attics, crawl spaces, and basements, homeowners can save an average of 15% on heating and cooling — 11% on total energy costs, according to the EPA’s ENERGY STAR program. For the typical homeowner, this translates to about $200 pocketed year after year.
#26 Plant Shade Trees
Image: Liz Foreman for HouseLogic
Block the summer sun to lower cooling costs. Planting one shade tree on the west side and one on the east side of your home can shield your home from the sun during the summer months (but avoid south-side trees, which block winter sun). Carefully positioned trees can save up to 25% of the energy a typical household uses, according to Energy.gov. Plus, healthy, mature trees add an average 10% to a property’s value, says the Arbor Day Foundation.
#27 Use Curtains as Insulation
Another way to practice energy-saving passive heating and cooling? Open curtains on sunny windows in the winter and close them up in the summer.
#28 Cool with a Cross Breeze
On a breezy day, open a window on the side of your house that’s receiving the breeze, then open another on the opposite side of the house. Make sure the window on the receiving side is open a little less than the exhaust side to accelerate the breeze. You can also use a fan if there’s no breeze outside.
#29 Check Your Mortgage PMI
You’ll generally pay between $40 and $80 per month for every $100,000 borrowed, according to Freddie Mac. Keep in mind this amount can vary based on your credit score and your loan-to-value ratio — the amount you borrowed on your mortgage compared to the home’s value.
Once your loan-to-value ratio falls below 80% of the home’s original appraised value, you can request that PMI be canceled. If the value of your home appreciates before then, you might be able to cancel sooner.
#30 Check Your Home Insurance for Savings
Your homeowners insurance should change as your life changes. Installing home security devices — including smoke detectors, burglar and fire alarm systems or dead-bolt locks — could reduce your premiums, says the Insurance Information Institute.
Bundling your home and auto coverage could also save money on both policies. To be sure you’re getting the best price, check that any combined price from one insurer is lower than buying the coverage separately from different companies, according to the III.
Surveys have found you could be paying more than what another insurer would charge for the same coverage. So you could save by going with a new company or by using their quote to bargain with your current provider.
#31 Borrow Tools Instead of Buying
How often are you going to use that $600 demolition hammer once you remove your bathroom tile? Not so much? Rent it from a home-improvement store for a fraction of the cost. Be sure to do the math for each tool and project, though; sometimes the rental price is high enough to justify buying it.
Or join a tool lending library or cooperative to borrow tools for free or much less than retail stores.
#32 Cut Back on Paper Towels
Two rolls of paper towels a week add up to about $182 every year! Instead, try machine-washable cotton shop towels. They clean up messes just as fast and cost less than $2 for five. Save paper towels for messes that need to go straight into the trash, like oil and grease.
A pop of color in your landscaping perks up your curb appeal. But instead of wasting household funds on short-lived annuals, invest in perennials that will keep giving for years to come.
#34 Water Grass in the Morning to Save on Your Water Bill
Turning the sprinkler on at midday is kinda like watering the air — especially when the mercury soars. Lose less to evaporation by watering during cooler hours (but avoid overnight watering, when too-slow evaporation can invite fungus growth).
#35 Make Your Yard Drought-Tolerant
Swapping out 100 square feet of lawn with low water plants can save a homeowner 1,000 gallons of water the first year. After three years, savings can increase because plants have established root systems and need even less water.
“Visit HouseLogic.com for more articles like this. Reprinted from HouseLogic.com with permission of the NATIONAL ASSOCIATION OF REALTORS®.”


